| Important: |
Extract the zip-archive with your zip program:
- Open WinZip and press the button -Extract-
- In the window -Folders/drives-, select the folder that contain your
Poser program.
(ex. c:\program files\Poser4\ ).
- The check box -Use Folder names- must be marked.
That way, all files will placed in the correct path.
|
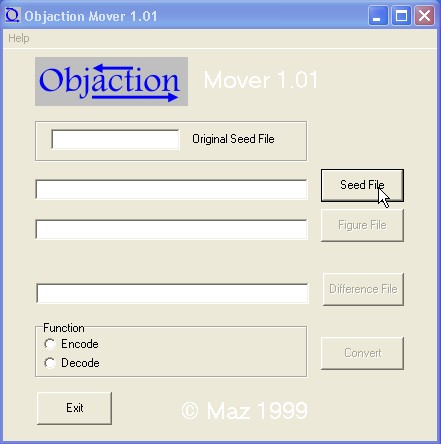
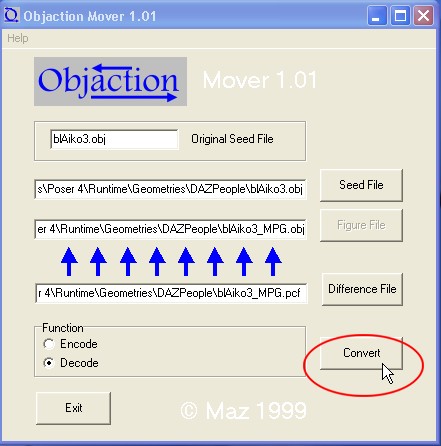
| NOW you need to DECODE the Aiko_MPG geometries file
Open MOVER program
1-press the button "Seed File"
|
 |
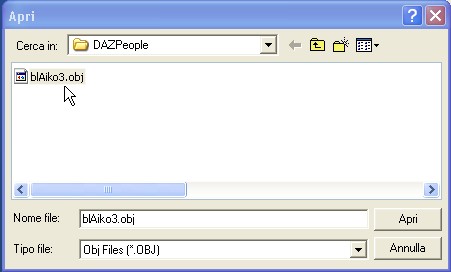
| 2-Open the geometries file
../Runtime/Geometries/DAZPeople/blAiko3.obj
|
 |
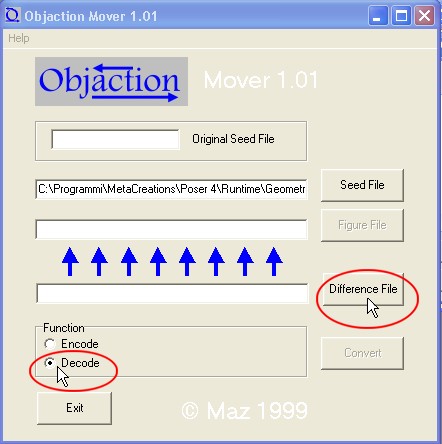
3-Now mark the Function option "Decode" and
press the "Difference File" button.
|
 |
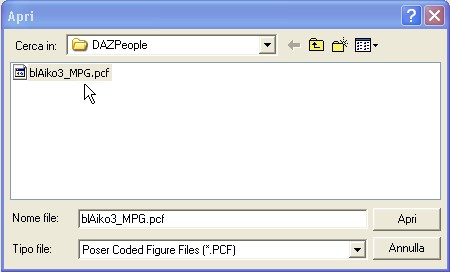
| 4- The Difference File is:
../Runtime/Geometries/DAZPeople/blAiko3_MPG.pcf
|
 |
| 5-Now Press the button "Convert"
The new geometries file will be created from the Mover program.
|
 |
|
New Aiko cr2 File Creation
|
|
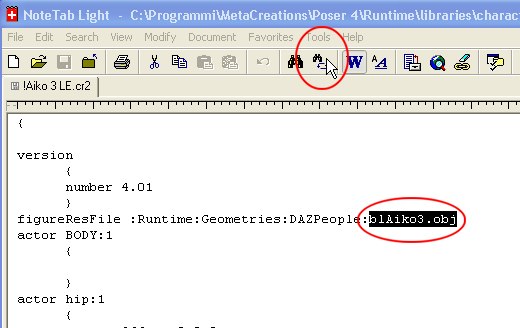
| Now we must create a new cr2 file (a new Figure) will refer to the new geometries file
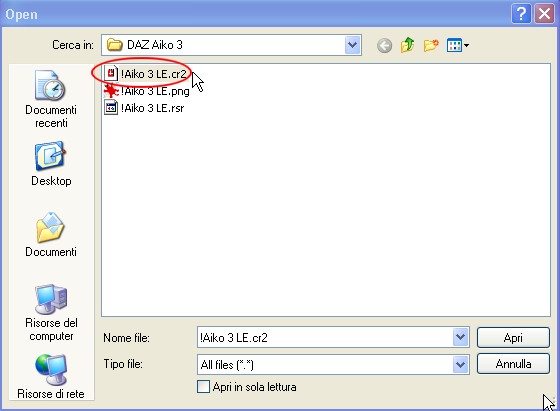
Open the text editor Note Tab Light
load the cr2 file: ../Runtime/libraries/character/DAZ Aiko 3/!Aiko
3 LE.cr2 |
 |
| Select the word "blAiko3.obj" and open the Tool
"Replace" (see the figure) |
 |
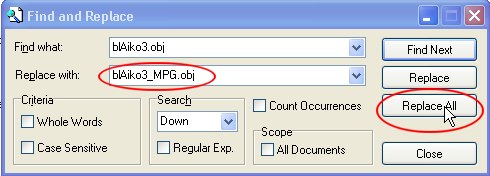
| Now you must replace the word: "blAiko3.obj"
with the word: "blAiko3_MPG.obj"
make sure that the "Find what" word and the "Replace
with" word be identical to those in the image
then, press the button "Replace All"
the Note Tab program will tell that two replacements have been performed.
|
 |
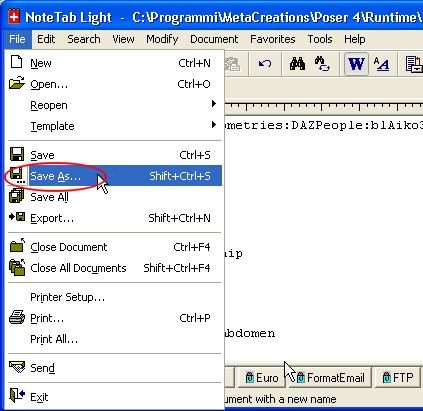
| Now you must save the nef cr2 file
use the tool "Save As..." from noteTab menu file
use the Save as option All Files (*.*)
Save the file with the name as you like but make sure that the
extension of the file is ".cr2"
as example: "NewNameFile.cr2"
preferably save the new cr2 file in this path:
../Runtime/libraries/character/DAZ Aiko 3/
|
 |
| The new cr2 figure will have this icon: |
 |
|
Apply the morph targets
|
|
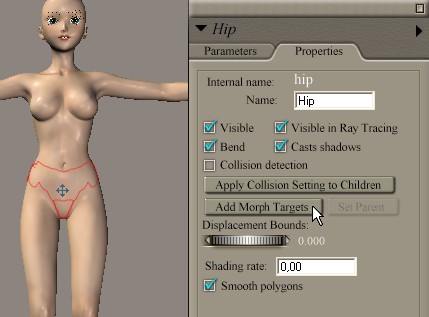
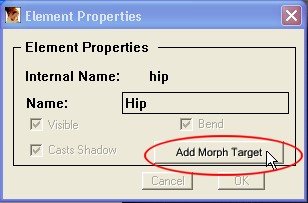
| Step -1
All the Aiko Hip Morph are in this folder:
..\Runtime\Aiko_MPG\HipMorph\
Open the new Aiko_MPG figure (the new cr2)
Click two time on the Aiko hip
POSER 5: opens the Properties window
POSER 4: opens the Element Properties window
Click on the button "Add Morph Targets"
|
POSER 5
POSER 4 |
| Step-2
Locate the Morph targets in the folder:
..\Runtime\Aiko_MPG\HipMorph\
|
 |
| Step-3
Open the first Morph Target: "01-GENITAL.obj"
|
 |
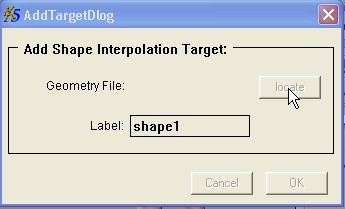
| Step-4
Enter the Label: "GENITAL" in the "AddTargetDlog"
window and click "OK"
in Poser 4 click "OK" again.
|

Poser5

Poser4
|
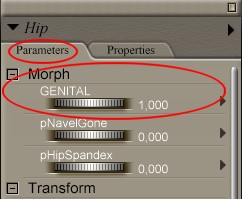
| Step-5
A new morph is added to the Hip Morph targets list
IMPORTANT the value of the Morph "GENITAL" must always be 1.
You can change the value of the other morph as you want, but "GENITAL"
must be set to "1"
Apply the other MT repeating the steps from 1 to 5 and respect the order from 02 to 16.
Then don't forget to save you figure in your preferred poser library!
For transfer the MT on other Aiko figures it's not necessary repeat this procedure,
you can use "Morph Manager program" (free on internet)
|
POSER 5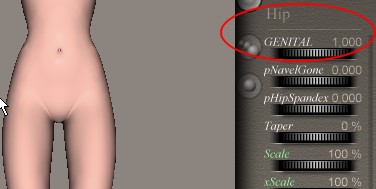
POSER 4
|